Home improvements don’t always happen inside the house—like in kitchens, bathrooms, and bedrooms—there are a wide variety of tips, tools, and ideas out there to extend DIY projects outdoors as well as indoors. Investing in a good diamond blade like the Gila Tools Super Duty Turbo Blade can open up a world of DIY opportunities for your home. This diamond blade is engineered for cutting Cured Concrete, Reinforced Concrete, Roof Tile, Concrete Pipe, Hard Brick/Block, Refactory Brick, Pavers, Natural Stone, Asphalt, Asphalt overlay on Concrete, Green Concrete and Masonry Materials—which means you can do and build just about anything!
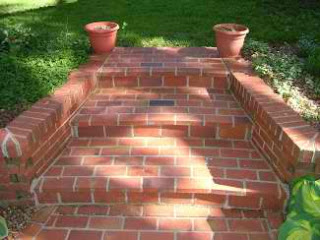
A really nifty home improvement project for your outdoors area is installing brick steps. Brick steps instantly add that classic touch to the overall look or impact of your home. Not only that, they are the kind of fixtures that are build to last decades, even generations, if done right. So take your trusty diamond blade and turn your attention to these timeless tips for building your own brick steps.
Tip #1: Use special 1.5-inch-thick paving brick designed to be laid horizontally on the ground. These paving bricks should be fired in the kiln at a high temperature for a significant amount of time. So that ice, snow and countless freeze-thaw cycles will not deteriorated the brick.
Tip #2: Traditional brick steps are actually built as two sets of steps. There is the set of brick stairs you see, and the one underneath the finished brick. The set of steps underneath is built using concrete block.
Tip #3: Pour a concrete pad that acts as the foundation for the brick steps so that the brick steps will not crack or crumble despite the heavy weight. This concrete pad should be 6-inches thick and have one-half inch steel reinforcing bars spaced at one-foot centers placed in a grid pattern like a crossword puzzle. The steel should be placed in the middle of the wet concrete. Take the time to make sure this concrete is poured on compacted ground, and the finished surface of the concrete is level.
Tip #4: Use different sized concrete block and concrete brick to build the set of steps that have the same width, depth and tread height as the finished brick steps. It is important that the first set of concrete block steps are level side to side and that the treads tilt forward so water runs down each step to the patio. Engineer a tilt of one-eighth inch per foot of fall to each tread to achieve good drainage. You don't ever want water to pool on a stair tread.
Tip #5: Keep cuts to a minimum. Only make cuts on the sides of each tread where the brick steps butted up to small brick retaining walls on either side of the steps.
Tip #6: Do not use traditional brick mortar. Use mortar that is a mixture of fine sand and Portland cement. Portland cement is formulated to withstand ice and snow when mixed, installed and cured properly. I used a blend of three parts sand to one part Portland cement for my mortar.
Tip #7: When creating the 6-inch riser height for each step, place the brick on its narrow edge so the flat part of the brick creates the riser face. The bottom edge of the brick should flush with the back brick of the tread below. The one-half-inch wide mortar joint between the top of the riser brick and the flat tread brick above adds up to 2 inches exactly.


